Disclaimer: This post may contain affiliate links. You can read my full disclosure here
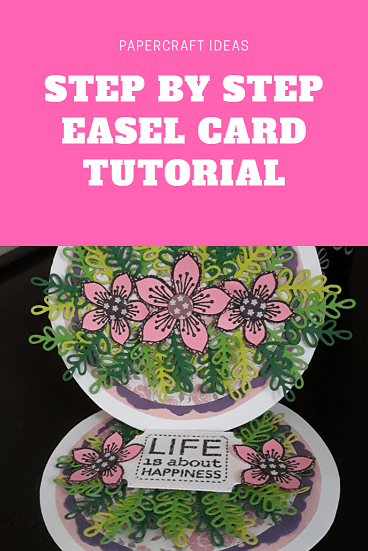
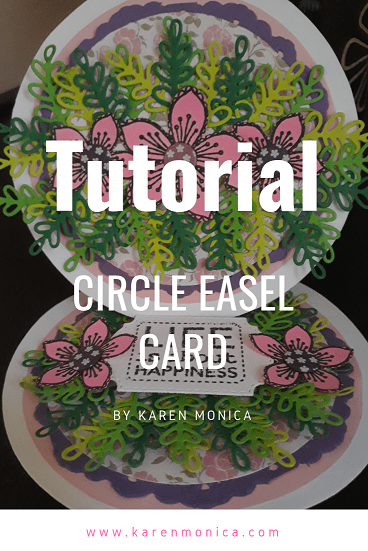
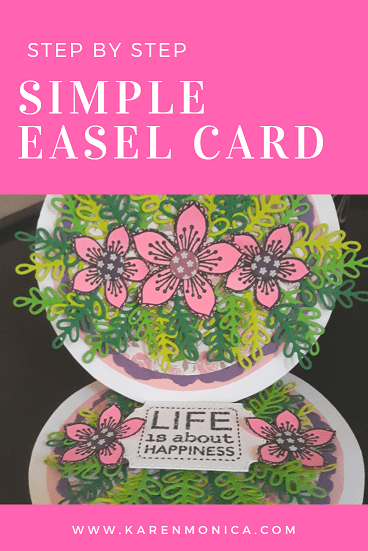
Step By Step Circle Easel Card Tutorial. Want to learn how to make an Easel Card? For today’s paper craft tutorial, I will share with you a simple step by step picture guide to make a circle easel card.
To be honest, I have made quite a few square and rectangular easel card but this is the first time I am making a circle shaped easel.
Simple Step By Step Circle Easel Card Tutorial
You would need two A4 cards. For this project I decided to use white card as base. You can use any coloured card or sizes of your choice. See below for a detailed list of items that I used to begin my easel card paper craft project
- A4 white card – 2
- A4 pink card – 1
- purple paper doilies – 2
- patterned card – 1
- paper flowers and leaves for decorations
- sentiment stamp
- scisorrs
- glue
How To Make A Simple Easel Card
Here is a step by step tutorial to make your very own round easel card
Preparing To Make The Circle Easel Card
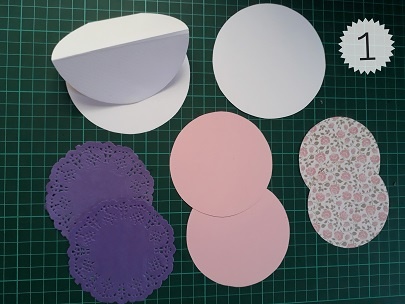
First of all fold one white A4 card into half and cut it into a circle shape. Remember that it has to joined a little bit at one edge of the card. If you are die cutting it, place your circle die a little bit out from the folded edge of your card. If you are drawing a circle before cutting it, draw a little bit out from the folded side. After you have cut it, fold one side of the circle into half as in the picture above.
Next cut the other white A4 card without folding the card. Cut it exactly the same size as the first A4 card. But this time you don’t need double, just a single card.
Related Articles: Step By Step Kusudama Flower Tutorial
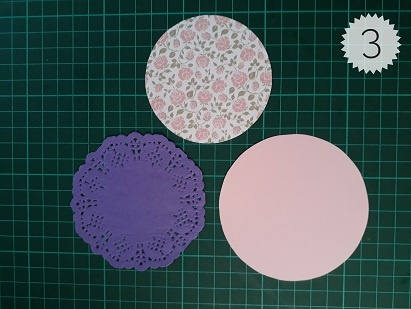
Continue by cutting the pink coloured card. You need two pink circles. Make sure the circle is one size smaller than the white base card. And cut another two circles from the patterned cut. It has to be one size smaller from the pink card.
If you don’t have coloured paper doilies, you can use doily dies to cut two circles. You can also use a scallop circle die to cut it. Just make sure that it’s diameter is a little bit bigger compared to the patterned card circles.
Before we proceed to the next step of the Step By Step Circle Easel Card Tutorial, recheck to see if you have the same amount of cut out circles as in the picture above. (picture 1)
Decoratios For The Circle Easel Card
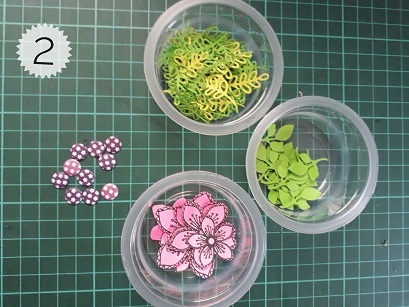
In the above picture (picture 2) you can see that I have die cut some green and yellow leaves and pink flowers. There are also some paper candi to add as the embellishment for my easel card. You don’t have to used them all though. You can decorate you circle easel card with your own ideas.
Putting Together The Circle Easel Card
Take your first pink circle and glue the purple paper doily above it. Then glue the patterned card above the purple paper doily. After you have glue all three circle together, it would look as in the picture below (picture 4)
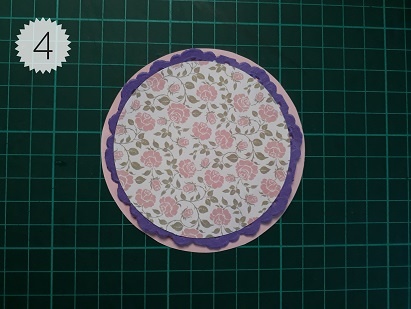
Repeat the process with the other set of cut out circles. Make sure that you glue the circles in the same order.
As a reminder, you don’t necessary need to follow exactly the colour cards that I am using. You can use any colour cards of your own choices. Just make sure the colours blend with one another.
Sentiment For The Circle Easel Card
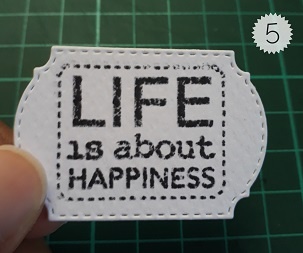
Stamp out a sentiment of your choice. And die cut or hand cut the sentiment to make sure it fits into the center of your easel card. I don’t remember where I bought this stamp. Even though its not from a very good quality stamp (it doesn’t stamp very clearly) but I like the message that it carries. “Life Is About Happiness”
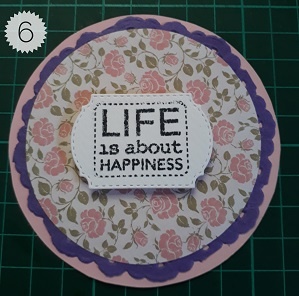
Use a double sided foam pad to stick the sentiment at the center as in the picture above (Picture 6). Remember that you only have to place the sentiment on the card that will be at the bottom part of your easel card.
Completing The Circle Easel Card
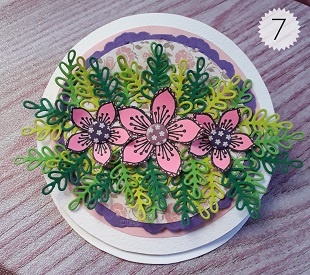
Now you can start to decorate both circles that you have glued earlier. Be creative. After decorating both circles, it’s time to glue them to the base card. First glue the one without sentiment to the single white circle card that you have cut out earlier. Then glue it to the top part of the easel card (the folded side facing up)
Next glue the card with the sentiment to the white base card (inside of the fold)
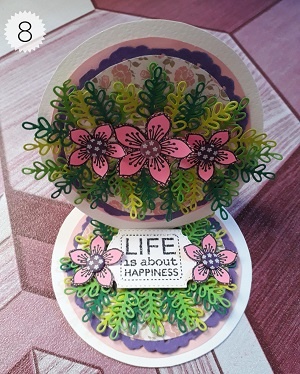
If you have followed all the Step By Step Circle Easel Card Tutorial correctly, your card will look as in the picture above (Picture 8)
Hopefully you can make your very own Circle Easel Card after following my Step By Step Circle Easel Card Tutorial. If you have any questions, don’t hesitate to leave me a comment below. I would love to hear from you. And do share with me your very own handmade Easel Card photos.

I have never tried making it out. And I love your blog for these posts. Tonight if I make it I’ll pm you the outcome.
So happy to hear that. Yes please do let me know the outcome. Would love to see it 🙂